Views: 0 Author: Site Editor Publish Time: 2026-06-05 Origin: Site


Installing a glass greenhouse is a precision engineering task, not a standard backyard DIY project. Frame misalignment by even a few millimeters can lead to glass shattering, poor climate control, or structural failure under load. Precision remains paramount at every step. We cannot treat this like assembling basic patio furniture because rigid panes leave zero room for error.
This guide provides a standardized, risk-aware roadmap for evaluation and execution. We will help you bridge the gap between flat-pack delivery and a fully operational growing environment. By following these structured phases, you ensure structural integrity. You will learn the exact steps needed for site preparation, framing, safe glazing, and interior systems integration. We aim to equip you with professional-grade knowledge to handle this challenging build successfully.
Foundation is non-negotiable: A perfectly level and square base is the primary success criterion for any rigid glazing installation.
Safety dictates pacing: The glazing phase requires specific weather conditions, dedicated PPE, and specialized handling techniques to mitigate breakage risks.
System integration happens early: Factoring in plumbing and electrical needs before assembly is critical for advanced setups.
Professional fitting vs. DIY: Evaluating the cost of professional installation against the warranty risks and time commitments of self-assembly.
A structural failure post-installation often traces back to poor site selection and foundation preparation. When ground shifts beneath a rigid structure, disaster follows. We must address the physical environment before unpacking a single box of components.
You need to begin with a thorough site evaluation. Assess sun exposure, wind corridors, and soil stability in your chosen location. Sunlight drives photosynthesis, but excessive wind creates dangerous uplift forces. Soil stability prevents long-term settling. As an implementation reality, you must map underground utilities early. If you plan on trenching for power or water lines later, striking a buried cable or pipe causes massive delays and safety hazards. Plan utility routes before breaking ground.
Foundation requirements represent the most critical hurdle. Compare concrete perimeters, slab foundations, and compacted gravel. Each serves different operational needs. Concrete provides maximum permanence. Slabs offer clean floors but require integrated drainage. Compacted gravel drains well but demands rigorous leveling. The crucial metric remains consistent across all types: the foundation must sit level to precise millimeter tolerances. If your base goes out of square, panels will not seat correctly in their extruded channels. Glass does not forgive bad geometry.
Foundation Type | Ideal Application | Leveling Difficulty | Drainage Capacity |
|---|---|---|---|
Concrete Perimeter (Strip) | Permanent structures, soil beds inside | Moderate (requires precise formwork) | Excellent (natural soil interior) |
Full Concrete Slab | Hydroponic setups, heavy staging | High (requires mechanical floating) | Poor (unless drains are pre-plumbed) |
Compacted Gravel/Crush | Temporary or semi-permanent setups | Low to Moderate (requires tamping) | Superior |
Do not ignore permitting and compliance. Check local zoning laws and homeowner association (HOA) restrictions early. Permanent structures often require specialized building permits. Zoning boards might dictate setback rules regarding how close you can build to your property line. Securing these approvals prevents legal headaches and forced teardowns later.
Building the skeleton correctly dictates the success of the entire project. Solution categories generally divide into aluminum versus steel frame considerations. Aluminum resists corrosion naturally and provides lightweight strength. Steel offers superior load-bearing capacity but requires galvanization to prevent rust. Your climate and architectural choices will drive this decision.
Base anchoring demands immediate attention once you lay out the parts. You must secure the base plinth to the foundation to withstand extreme wind uplift. A stiff breeze hitting a partially assembled frame acts like a sail. Use heavy-duty expansion anchors in concrete or specialized earth anchors for soil bases. Never skip this anchoring step.
You must follow strict structural assembly logic to prevent unbalanced loads during the build. Industry standards recommend a specific sequence:
Assemble the gable ends: Build the front and rear walls flat on the ground. Lift them into position and brace them temporarily.
Install the eaves and ridge bar: Connect the two gables using the main horizontal supports. This creates a self-supporting box.
Add side glazing bars: Space these out according to the manual to give the walls vertical rigidity.
Attach roof rafters: Connect the eaves to the central ridge bar, forming the roof pitch.
Certain architectural choices complicate this process but offer massive environmental rewards. For example, erecting a Stable Arched Glass Greenhouse requires bending frame channels into tension. However, the benefits of shedding snow loads efficiently and maximizing interior atmospheric volume far outweigh the complex assembly. The arched roof prevents heavy snow accumulation, protecting the structure during harsh winters.
Squaring the frame remains a mandatory checkpoint. You must perform the critical diagonal measurement test. Measure from the front-left corner to the rear-right corner. Then measure front-right to rear-left. These two numbers must match exactly. Do not fully tighten your structural bolts until you prove the structure sits perfectly square and plumb. Premature tightening locks in errors. Hand-tighten everything first, adjust the diagonals, and then torque bolts to manufacturer specifications.
We classify glazing as the highest liability phase. Moving large, heavy, and fragile panes introduces significant safety hazards. You must enforce strict risk assessment protocols. Specialized personal protective equipment (PPE) remains mandatory. Equip your team with heavy-duty cut-resistant gloves, protective eyewear, and steel-toed boots. You also need professional pump-action suction lifters. Relying on bare hands to maneuver heavy panes invites severe injury and broken materials.
Standard operating procedure dictates a specific glazing order. Start from the roof. Once you finish the roof, move to the side walls. This top-down approach prevents tools or errant hardware from dropping onto lower panes. Gravity works against you during roof installation. Take your time and ensure each pane slides securely into its designated track before releasing your suction grips.
Sealing mechanisms directly impact long-term energy efficiency and weather resistance. You will typically evaluate W-clips versus bar capping systems. Traditional W-clips hold panels in place using tension. They work fine for small setups but often fail during high winds. Bar capping systems provide superior retention. They screw down over the entire edge of the pane, locking it uniformly into the frame.
Always highlight the role of rubber gaskets and butyl glazing tape. These materials create an airtight seal around the perimeter of every pane. An airtight seal prevents heat from escaping during winter and stops water ingress during storms. Take time to press butyl tape firmly into the channels before seating the panels. Do not stretch rubber gaskets during installation, as they will shrink later and leave gaps.
Weather dictates pacing. As a hard implementation rule, never attempt the glazing phase during high winds or wet conditions. Wind catches large panes like kites, easily tearing them from your grip. Wet conditions make aluminum frames incredibly slippery, increasing the risk of dropped materials or dangerous falls from ladders. Wait for a calm, dry day.
A shell provides protection, but a greenhouse requires internal systems to function. Feature-to-outcome mapping shows us how bare structures transform into productive ecosystems. You must install environmental controls to regulate temperature, humidity, and airflow.
Utility routing requires careful planning to maintain aesthetics and comply with structural warranties. You need to secure water lines, automated venting systems, and electrical conduits along the structural frame. Do not drill random holes into primary load-bearing aluminum extrusions. Doing so compromises structural integrity and often voids manufacturer warranties. Instead, utilize integrated T-tracks or specialized bolt-on clips designed for utility management.
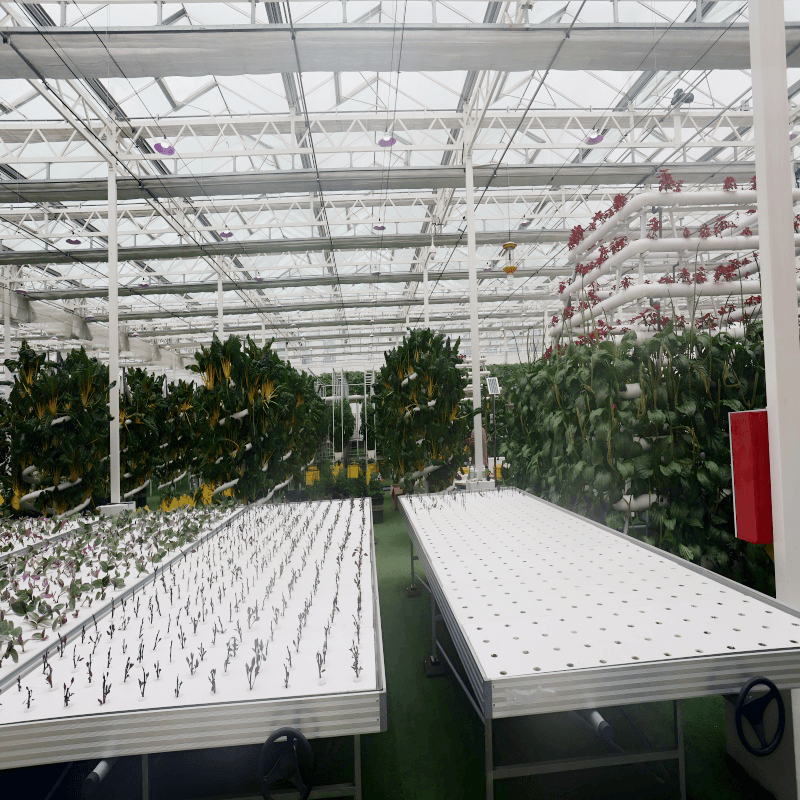
When planning specialized environments, requirements become much stricter. Setting up a Hydroponic And Soilless Glass Greenhouse demands exceptional foresight. You will rely heavily on controlled liquid nutrient delivery rather than traditional soil beds. This operational shift forces specific installation prerequisites.
Chart: Advanced Interior System Requirements | ||
System Need | Structural Prerequisite | Common Mistake |
|---|---|---|
Heavy Water Reservoirs | Reinforced concrete slab flooring | Placing tanks on soft soil, causing tilt |
Commercial Grow Lights | Custom structural hanging points on ridge bar | Hanging off weak glazing bars |
Drip Manifolds | Pre-planned PVC conduit routing | Creating tripping hazards across walkways |
Address the need for reinforced flooring early. Massive water reservoirs generate intense point loads. A standard gravel base will sink under the weight of a 500-gallon hydroponic tank. You must pour reinforced concrete footings for heavy equipment. Furthermore, plan your custom structural hanging points carefully. High-intensity grow lights and overhead drip manifolds add significant downward pressure to roof rafters. Verify weight ratings with the frame manufacturer before hanging heavy climate-control gear.
Choosing your assembly method dictates the stress, timeline, and final quality of the project. Use a logical evaluation framework to decide whether to build it yourself or hire certified installers. Both paths present distinct advantages and profound challenges.
The DIY route appeals to handy individuals looking to save upfront capital. However, you must respect the assumptions built into self-assembly. Installing a moderate-sized unit requires a minimum of two physically capable adults. You also need dedicated scaffolding; basic step ladders prove insufficient and dangerous for roof glazing. Expect the build to consume three to five full days of labor.
Hidden DIY Costs: You will need to purchase specialized tools. Heavy-duty glass suction cups, laser levels, proper socket sets, and scaffolding rentals add up quickly. Factor these into your budget before committing.
Physical Risk: Managing bulky materials at height exposes amateurs to injury.
Warranty Liability: If you install a pane incorrectly and it shatters, you bear the replacement burden.
The professional fitter route changes the equation entirely. Certified installers bring specialized experience and optimized workflows. Their return on investment manifests through speed of deployment. Pros often complete a standard build in just one to two days. They guarantee structural squareness and deliver immediate operational readiness.
Risk mitigation remains the strongest argument for hiring professionals. Legitimate installation crews carry liability insurance for breakage during installation. If a gust of wind catches a pane and shatters it, their insurance covers the loss. Furthermore, professional installation guarantees preservation of manufacturer warranties. Many brands void their structural guarantees if an amateur botches the frame assembly.
Take actionable next steps to protect yourself. Audit a contractor's credentials rigorously. Ask for specific portfolios showing previous rigid glazing builds, not just standard wooden sheds. Shed builders often lack the micrometer precision required for fragile materials. Request a detailed site-survey quote to uncover hidden foundation grading issues before you sign a contract.
Successful installation hinges on foundational accuracy and strict adherence to structural tolerances. We cannot overstate this reality. Every subsequent step relies heavily on the quality of your site preparation and base squaring. Precision at the ground level prevents catastrophic failures at the roof level. You must respect the rigid nature of your building materials.
Keep a skeptical eye on your pacing. Warn your team against rushing the build. Fatigue causes mistakes, and mistakes cause breakage. Never ignore manufacturer-specific torque settings for frame bolts. Over-tightening warps aluminum channels, while under-tightening leaves the structure vulnerable to wind shear. Follow the engineering guidelines closely to ensure longevity.
If you feel overwhelmed by the technical requirements, take proactive steps now. Download a comprehensive pre-site-prep checklist to evaluate your yard. Consider requesting a structural consultation to analyze your foundation plans. Alternatively, browse professional installation packages to shift the liability off your shoulders entirely. Your botanical success depends on a flawless architectural start.
A: Yes. You must use toughened safety glass (TSG) instead of standard horticultural glass. TSG resists impact and thermal shock significantly better. If it breaks, it shatters into small, blunt pebbles rather than lethal, jagged shards. This safety feature ensures compliance with local building codes, especially for overhead roofs and high-traffic garden environments.
A: You should expect realistic timelines based on experience. Experienced DIYers usually need 3 to 5 full days, assuming two capable adults are working together. Professional crews can complete the same structure in 1 to 2 days. These timelines exclude foundation pouring and concrete curing time, which requires an additional week prior to framing.
A: We heavily discourage this practice. Ground settling is inevitable. As the soil shifts after rain or seasonal freezes, the foundation moves. This uneven shifting warps the rigid aluminum frame. Because panels cannot bend, frame warping causes explosive shattering. Always use a concrete perimeter, a slab, or heavily compacted and leveled gravel.
A: You must perform annual checks on the rubber gasket integrity to ensure airtight seals remain intact. Clear all gutter channels and downspouts frequently to prevent water ingress and overflow damage. Finally, re-tighten all structural frame bolts after the first winter season, as temperature fluctuations often cause minor metal expansion and contraction.


