Views: 0 Author: Site Editor Publish Time: 2026-06-10 Origin: Site


Replacing greenhouse panels is a capital- and labor-intensive project. It demands significant time and resources. This holds true whether you manage a backyard setup or a large commercial operation. Older panels often suffer from severe UV degradation, hail damage, or thermal inefficiency. These ongoing issues lead to compromised crop yields. They also cause significantly higher winter heating costs.
We provide an objective, spec-driven framework for this necessary upgrade. You will learn how to evaluate materials and install replacement panels correctly. We will help you navigate the market without falling for misleading manufacturer claims.
Thickness dictates application: 4mm is strictly for mild climates; 6mm–8mm twin-wall is the baseline for year-round thermal retention.
UV protection is non-negotiable: Panels must be co-extruded with UV inhibitors, not merely coated, to prevent premature yellowing.
Installation dictates lifespan: Failure to account for thermal expansion or proper flute sealing voids warranties and causes internal algae growth.
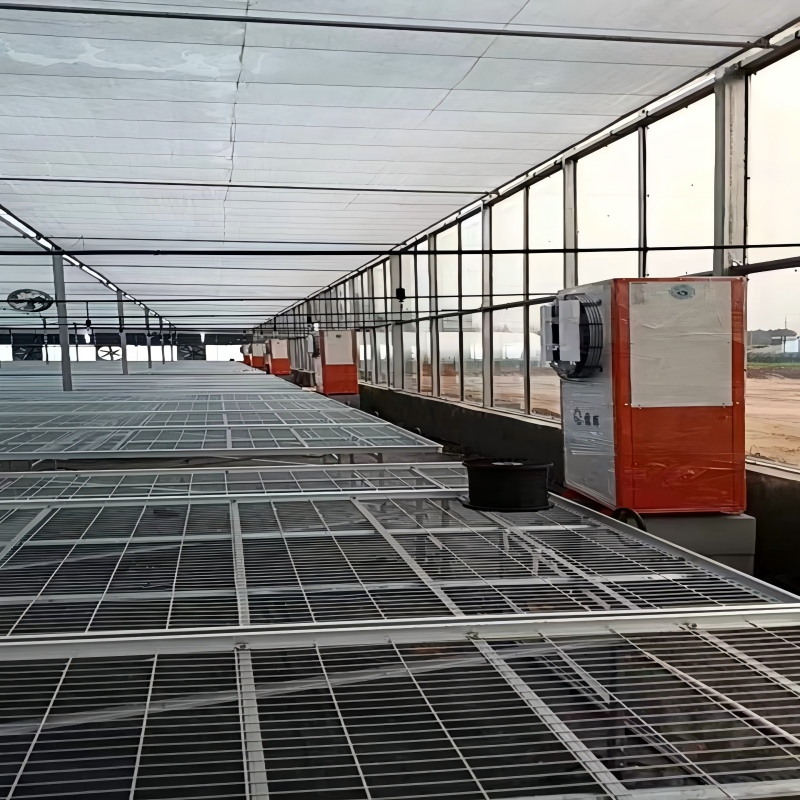
Commercial scalability: Upgrading a Venlo PC Sheet Greenhouse or a Multi-Span PC Greenhouse requires specialized light-diffusion metrics and load-bearing profiles.
You must recognize the exact signs of panel failure to time your replacements properly. Old panels do not simply break; they degrade slowly over time. Identifying these subtle shifts prevents catastrophic structural failures during harsh weather.
Micro-cracking: Look for tiny, spiderweb-like fractures across the panel surface. They indicate severe plasticizer loss.
Severe yellowing: A yellow tint means the UV layer has failed. This blocks vital photosynthetically active radiation (PAR). A visual yellowing often equals a light transmission loss greater than 15%.
Brittleness: If you press on a panel and it feels rigid or sounds crunchy, it has lost its impact resistance. It will easily shatter during the next hail storm.
Many growers debate between glass, poly film, and polycarbonate. Glass provides excellent light but shatters easily. It also requires heavy structural framing. Poly film tears easily and requires complete replacement every three to four years. A polycarbonate greenhouse offers incredible impact resistance. It can withstand heavy impacts that destroy glass. Furthermore, a twin-wall structure yields 30% better thermal insulation than single-pane glass or standard film.
You can easily build a solid business case for this upgrade. Replacing degraded panels directly reduces winter heating costs. Twin-wall structures trap an insulating layer of air. This prevents heat from escaping rapidly at night. New panels also improve light diffusion. Diffused light penetrates deeper into the plant canopy. It ensures uniform growth and prevents upper-leaf burns. Finally, modern panels reduce maintenance labor. You spend less time patching leaks and cleaning algae.
Selecting the correct structure determines the ultimate success of your growing season. You must balance light transmission requirements against your local climate constraints.
Twin-wall panels remain the industry standard. They offer a perfect balance for most growers. They typically deliver around 80% light transmission. They also provide excellent baseline insulation. Multi-wall panels, including triple-wall or 5-wall structures, serve extreme cold climates. They trap multiple layers of air for maximum heat retention. However, you must acknowledge a critical trade-off. Multi-wall panels reduce light transmission significantly. You might need supplemental grow lights during dark winter months.
Thickness maps directly to specific wind and snow load ratings. You cannot simply guess the required thickness. Use the table below to align panel thickness with typical environmental loads.
Panel Thickness | Structure Type | Typical Application | Load Bearing Capacity |
|---|---|---|---|
4mm | Twin-Wall | Mild climates, spring seed starting | Low snow load, minimal wind resistance |
6mm | Twin-Wall | Standard backyard, moderate weather | Moderate wind resistance, light snow |
8mm | Twin-Wall | Year-round commercial baseline | High structural rigidity, moderate snow |
10mm+ | Multi-Wall | Extreme winter climates, high-altitude | Heavy snow load, extreme wind resistance |
Direct light isn't always best for plants. Harsh, direct sunlight casts deep shadows. It can scorch delicate upper foliage. You want diffused light. Many modern panels feature specialized light-diffusion properties. They scatter incoming light evenly. This bathes the entire plant in usable energy.
You also need anti-condensate or anti-drip treatments on the interior surface. Greenhouses are humid environments. Moisture condenses on the cold interior plastic. Without treatment, this water forms large droplets. These droplets fall directly onto your plants. They carry fungal spores and cause severe disease outbreaks. Anti-drip coatings lower the surface tension. Water sheets down the sides instead of dripping.
Finally, highlight the risks associated with cheap imported panels. Manufacturers often cut costs on UV protection. They use temporary spray coatings. These wash off or degrade quickly. Demand clear evidence of UV co-extrusion. In this process, the manufacturer melts UV inhibitors directly into the sun-facing side of the plastic. This permanent bond prevents premature yellowing and extends panel life.
Commercial upgrades introduce complex engineering challenges. You must integrate panels safely across wide structural spans. Standard hardware will not survive commercial wind loads.
Upgrading a Multi-Span PC Greenhouse requires continuous H-channel joining profiles. You cannot rely on overlapping flimsy plastic edges. Heavy-duty aluminum extrusions are mandatory. These metal profiles lock the panels securely in place. They prevent panels from blowing out during severe storms. They also maintain a watertight seal across expansive rooflines.
Certain architectural styles demand precise specifications. Replacing panels on a Venlo PC Sheet Greenhouse requires strict adherence to narrow pitch constraints. Venlo designs use a distinctive roof slope to maximize light capture. You must ensure high snow-load compliance. The panels must fit tightly into existing glazing bars. They must also meet precise light transmission thresholds. Commercial agriculture depends on exact light metrics to forecast harvest yields.
Fire ratings are another critical compliance factor. Commercial operations must pass strict building inspections. Verify the ASTM fire ratings before purchasing materials. Look for Class A or CC1/CC2 flammability standards. Polycarbonate is inherently flame-retardant, but inferior blends burn rapidly. Insurance policies often require proof of these specific fire ratings. Failing to provide this documentation can void your coverage entirely.
Even the highest-quality panels fail if installed incorrectly. Proper installation technique determines the lifespan of your investment.
Thermal expansion remains the number one failure point. Polycarbonate expands in the heat and contracts in the cold. It moves constantly. You must drill oversized holes for all fasteners. The hole should be slightly larger than the screw shaft. This gives the plastic room to shift. If you fasten the panel rigidly, it will buckle in the summer heat. It will eventually crack around the screw heads.
Orientation and sealing rules are strictly unforgiving.
UV Side Up: Panels feature a UV-protected side. It is clearly marked on the protective film. You must face this side toward the sun. Installing panels backward is a catastrophic mistake. The sun will destroy unprotected plastic within a year.
Flute Orientation: Twin-wall panels have hollow channels called flutes. You must install the panels so these flutes run vertically. Gravity allows internal condensation to drain out the bottom. Horizontal installation traps water permanently.
Taping: You must seal the flutes to keep out dust and insects. Apply solid aluminum tape across the top ridge. It blocks rain from entering. Apply breathable vent tape across the bottom edge. It allows trapped internal moisture to escape. Proper taping stops internal algae growth completely.
Cutting and handling require care. Follow these specific steps to avoid damage during preparation:
Use a circular saw equipped with a fine-tooth plastic-cutting blade. Standard wood blades chip and shatter the brittle edges.
Support the panel firmly on both sides of the cut to prevent violent vibrations.
Use an air compressor to blow out the flutes immediately after cutting. Plastic dust trapped inside will foster mold.
Leave the protective film in place. Only peel it back slightly at the edges for installation. Remove the main body of the film as the final step to prevent scratches.
Do not trust marketing brochures implicitly. You must evaluate the raw data and the legal terms behind the product.
Expose common warranty traps in the fine print. Many companies advertise "10-year warranties." However, they heavily prorate the value after year three. If your panel fails in year five, they might only offer a 20% discount on a replacement. Read the exclusions carefully. Many warranties completely exclude hail damage. Others void the warranty if you fail to use their proprietary taping systems.
Buyers must understand hidden shipping realities. Freight costs often surprise first-time buyers. Greenhouse panels are lightweight but incredibly bulky. Panels longer than 8 feet require specialized LTL (Less Than Truckload) freight. They do not ship via standard parcel services. Freight costs can drastically alter your total project budget. Always request a landed cost quote that includes delivery to your door.
Demand verifiable documentation before spending money. Ask suppliers for official technical data sheets (TDS). These documents contain laboratory-tested metrics. You need empirical proof of light transmission percentages. You must verify the specific R-values and U-values for thermal retention. If a supplier refuses to provide a TDS, find another vendor immediately.
Chart: Warranty Traps vs. Transparent Policies | ||
Evaluation Area | Common Warning Sign (Trap) | What to Demand (Transparent) |
|---|---|---|
Term Length | "10-Year Warranty" heavily prorated after 2-3 years. | Non-prorated or clearly scheduled depreciation over 10 years. |
Weather Damage | Excludes "Acts of God" including normal hail events. | Specifies impact resistance limits (e.g., handles hail up to 1-inch). |
Light Transmission | Vague promises of "long-lasting clarity." | Guarantees no more than a 6% loss of light transmission over 10 years. |
Documentation | Relying strictly on website marketing claims. | Supplies official Technical Data Sheets (TDS) upon request. |
Successful polycarbonate panel replacement requires equal attention to material selection and strict installation compliance. You must source high-quality, UV-co-extruded panels that match your specific climate loads. You must also install them carefully, accounting for thermal expansion and moisture drainage.
We advise against cutting your budget on joining profiles or specialized fasteners. Heavy-duty H-channels, U-profiles, and oversized washer screws physically hold the structure together. They directly dictate the panel's lifespan. Cheap hardware ruins expensive plastic.
Your next steps are clear. Measure your existing framing spans accurately. Calculate your required load ratings based on local snow and wind data. Finally, request material samples and technical data sheets from your shortlisted vendors. Verify their claims before making your purchase.
A: Yes, you can cut them easily. Use a circular saw equipped with a fine-tooth plastic-cutting blade to prevent chipping. Cut the panels on a flat, stable surface. Ensure you blow the hollow flutes clean of plastic debris with compressed air immediately after cutting.
A: The side with the printed protective film faces the sun. It contains the specialized UV-resistant layer. Installing the panel backward is a costly mistake. The plastic will degrade, turn yellow, and become brittle within 12 to 18 months.
A: You must seal the flutes properly. Use breathable vent tape on the bottom edge to let moisture escape. Use solid aluminum tape on the top edge to block rain. You must also ensure panels are installed with the flutes running vertically for proper drainage.
A: Yes, it is highly recommended. 4mm panels only suit temporary spring seed-starter setups. Upgrading to 6mm or 8mm drastically improves the structural rigidity against wind. It also significantly increases thermal retention, which lowers your heating costs.


