
Views: 0 Author: Site Editor Publish Time: 2026-09-14 Origin: Site


Installing greenhouse roof panels dictates the structural survival of your entire build. The roof takes the brunt of wind uplift, heavy snow loads, and constant ultraviolet exposure. When overhead glazing fails, you risk losing entire crop cycles overnight. Panel blowouts, internal condensation buildup, and stress-cracking rarely happen because of defective materials. These failures almost always stem from poor installation habits. Builders often ignore thermal expansion, use the wrong fastening profiles, or forget to clear flutes after cutting sheets.
You need a strict, technical approach to install roof panels on a polycarbonate greenhouse. This guide covers framing preparation, profile selection, and weather-tight fastening protocols. We will walk through the exact steps to ensure your roof assembly stays locked down, leak-proof, and resilient against severe weather. Proper execution prevents water ingress, stops wind damage, and maximizes the lifespan of your glazing system.
Thermal Expansion is Non-Negotiable: Polycarbonate expands and contracts significantly with temperature changes; failing to pre-drill oversized holes or leaving inadequate edge clearance will cause buckling.
Orientation and Sealing Dictate Lifespan: Flutes must run vertically to allow condensation drainage, utilizing breathable tape at the bottom and solid aluminum tape at the top.
Profile Selection Matters: Relying solely on screws rather than structural H-channels and U-profiles compromises the wind load capacity and water-tightness of the roof assembly.
Frame Compatibility: Fastening methods must be adapted based on the substrate, with specific torque and fastener requirements for a steel frame polycarbonate greenhouse versus a timber frame.
Before you order panels or make a single cut, you must verify the underlying roof structure. The framework dictates the success of the glazing installation. A roof requires an accurate pitch to shed water and snow effectively. We mandate a minimum 10-degree slope for proper water runoff. Anything less allows water to pool in the center of the panels. Pooling water increases the static load, causes the plastic to deflect, and forces moisture past the sealing tapes. Proper pitch also drives internal condensation management. It allows droplets to run down the interior surface of the flutes rather than dripping onto the plants below.
You must also verify your purlin and rafter spacing. Multi-wall panels require continuous support beneath the joining profiles. If your rafters are spaced 24 inches on center, your panels must be cut to break exactly on that 24-inch mark. Unsupported joints will collapse under minimal snow loads.
The material of your structural frame heavily influences how you approach panel joining and fastening. You must adapt your techniques to the specific substrate you are working with.
Wood Framing: Standard dimensional lumber presents challenges for panel joints. You need wider rafters to accommodate 3-inch aluminum connector profiles securely. We recommend sistering 2x4s or utilizing 3x3 glue-lams. This provides sufficient surface area to fasten the base profiles without splitting the wood. It ensures the panel joints have adequate structural support underneath.
Metal Framing: Metal structures require strict adherence to specific tolerances. When building a galvanized steel polycarbonate greenhouse, you must account for galvanic corrosion. Ensure all aluminum extrusion profiles and metal fasteners are compatible with the galvanized coating. Isolate dissimilar metals using specialized neoprene tapes or rubberized barriers to prevent accelerated degradation of the framing. Metal frames do not forgive measurement errors; your structure must be perfectly square before glazing begins.
Executing a flawless installation requires professional-grade tools. Attempting to cut or fasten multi-wall plastics with improper equipment leads to jagged edges, cracked panels, and ruined materials.
Fine-tooth circular saw equipped with a 60-tooth to 80-tooth carbide blade designed specifically for plastics.
Step drill bits (e.g., 1/4 inch to 3/8 inch) to create snag-free, oversized holes without grabbing and cracking the material.
Heavy-duty air compressor with a narrow nozzle attachment to blast plastic shavings out of the flutes.
Impact drivers or drills with adjustable, low-torque clutch settings.
Heavy-duty suction cups for lifting and positioning large panels without bending them.
Safety protocols are absolute. Installers must never walk, kneel, or lean directly on polycarbonate panels. The material distributes uniform wind and snow loads, but it cannot handle the concentrated point-load of a human foot or knee. Stepping on a panel will crush the internal flutes and compromise the UV coating. You must use scaffolding, elevated work platforms, or dedicated crawling boards. Crawling boards must span across multiple rafters to transfer your weight directly to the structural framing, keeping all pressure off the glazing.
Securing multi-wall panels requires specialized extrusion systems. You cannot simply drive screws through the panels directly into the rafters without joining profiles. Doing so invites severe leaks, thermal buckling, and immediate structural failure.
H-Profiles join two panels vertically along the rafter. You have two primary options: polycarbonate snap-together channels and aluminum base-and-cap systems. Polycarbonate H-channels offer a uniform aesthetic and work well for small, low-wind builds. However, they are notoriously difficult to snap together over long spans and offer minimal structural rigidity. Aluminum base-and-cap systems provide superior clamping force. The aluminum base screws directly into the rafter, the panels lay inside the track, and the top cap screws down, locking the panels securely. You must ensure the thickness of the profile perfectly matches your glazing (e.g., using an 8mm profile for an 8mm twin-wall sheet).
U-Profiles cap the top and bottom horizontal edges of the panels. They prevent pest ingress, stop dirt accumulation, and protect the delicate sealing tapes from weather exposure. Bottom U-profiles must have weep holes drilled into them every 12 inches to allow condensation to escape.
Profile Type | Material Options | Primary Function | Installation Requirement |
|---|---|---|---|
H-Profile (Base & Cap) | Aluminum | Joins panels vertically along rafters | Fasten base to rafter every 12 inches; screw cap into base. |
Snap H-Channel | Polycarbonate | Light-duty vertical joining | Leave 1/8 inch expansion gap inside the channel. |
U-Profile | Aluminum, Polycarbonate | Caps top and bottom exposed flutes | Drill 1/8 inch weep holes in the bottom profile for drainage. |
Ridge Cap | Galvanized Steel, Aluminum | Seals the roof apex | Overlap top U-profiles by at least 3 inches; seal with silicone. |
Standard wood screws, drywall screws, or basic roofing screws are completely unacceptable for this application. Using them will crush the multi-wall structure and create immediate leak points. You must use hex-head screws equipped with bonded EPDM (Ethylene Propylene Diene Monomer) neoprene washers. EPDM resists UV degradation and extreme temperature fluctuations far better than standard rubber. When driven correctly, the EPDM washer compresses slightly to create a watertight seal over the oversized pre-drilled hole without crushing the plastic surface.
Managing the internal flutes requires two distinct types of tape. You apply solid foil tape to the ridge (top edge) of the panel. This completely blocks bulk water, dust, and insects from entering the flutes from the apex. You apply vent tape (anti-dust breathable tape) to the eave (bottom edge). This breathable membrane prevents bugs and dirt from entering while allowing internal condensation to drain out and evaporate naturally.
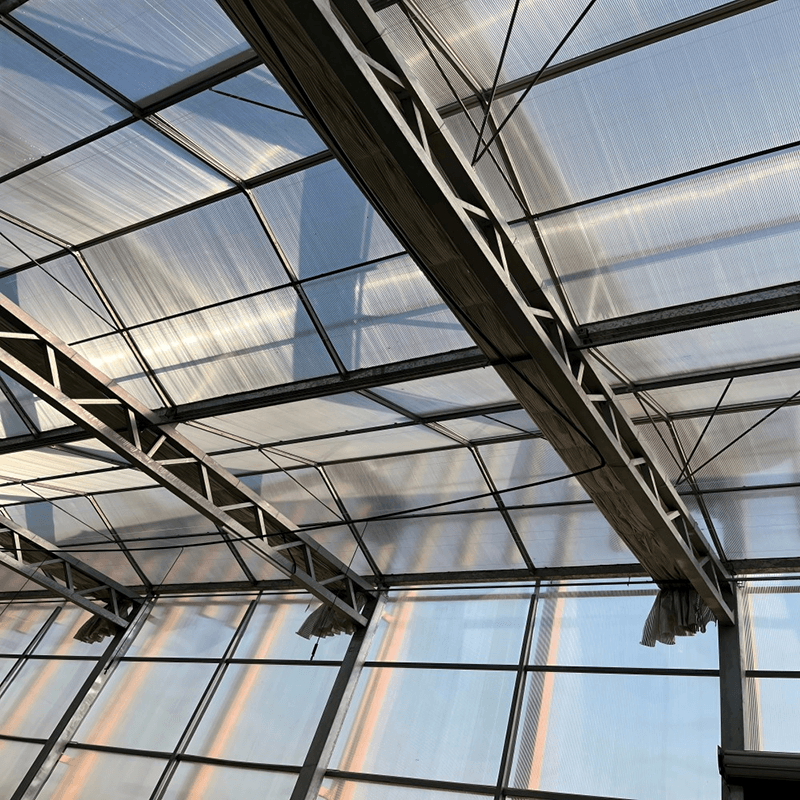
Accurate cutting prevents structural binding and ensures proper fitment within the extrusions. When cutting twin-wall or triple-wall sheets, use a circular saw equipped with a fine-tooth plastic-cutting blade. Set the blade depth so it barely protrudes past the bottom of the sheet. Support the panel fully on both sides of the cut line to prevent vibration cracking. Clamp a straight edge across the panel to guide the saw plate. Push the saw at a steady, moderate pace. Pushing too fast melts the plastic; pushing too slow causes chipping.
Immediately after cutting, you must address the debris. Hook up an air compressor with a narrow nozzle attachment. Insert the nozzle directly into each individual flute at the top edge of the cut panel. Blast compressed air down the channel to force out every single piece of plastic swarf. If you leave shavings inside, they will trap moisture and become a breeding ground for internal algae.
Multi-wall plastics are highly directional. You must identify the UV-protected side, which is almost always marked by heavily printed protective film. This side must face outward toward the sun. Installing the panel backward causes rapid yellowing and embrittlement within a single season. Confirm the flute direction; the internal channels must run parallel to the roof pitch to allow gravity-assisted drainage.
Lay the panel flat on a clean staging table.
Identify the UV-facing side and ensure it points up.
Peel back the protective film exactly two inches from all four edges.
Apply solid foil tape to the top edge, folding it smoothly over the faces.
Apply breathable vent tape to the bottom edge.
Leave the main body of the film intact to protect the surface from scratches during handling.
Direct contact between hard plastic panels and rigid framing causes abrasion and noise. Apply purlin tape or closed-cell foam sealing tape directly onto the rafters and horizontal purlins beneath the panels. This foam layer prevents physical abrasion as the panels expand and contract. It reduces thermal transfer between the framing and the glazing, and it completely eliminates the loud rattling noises associated with high winds.
When installing the roof, you must decide between a middle-out or edge-in placement strategy. For a large steel frame polycarbonate greenhouse, starting from the center and working outward ensures perfect symmetry. It distributes any cumulative measurement errors equally to the edges. Alternatively, starting from the leeward edge (the side facing away from prevailing winds) allows the overlapping profiles to naturally shed wind-driven rain.
Always ensure the main structural framing is completely squared and braced before attaching roof panels. Installers must account for how the roof eaves overlap with the side wall panels to ensure proper water shedding away from the foundation.
Begin by screwing the aluminum base profile directly to the rafter. Lay the prepared panel onto the foam-taped purlins and slide the edge into the base profile. Ensure you leave adequate expansion gaps inside the channel. Once the adjacent panel is placed, snap or screw the top cap into place, locking both panels down. Slide the U-profiles onto the top and bottom edges.
Immediately after the panel is fully secured and capped, mandate the complete removal of the remaining protective film. If left exposed to direct sunlight, the UV rays will bake the film's adhesive directly onto the glazing, making it nearly impossible to remove later.
Understanding the physics of thermal expansion prevents catastrophic buckling. Polycarbonate has a high coefficient of linear thermal expansion. A standard 12-foot panel expands and contracts by up to a quarter of an inch between the freezing temperatures of winter and the peak heat of summer. If you fasten the panels rigidly without allowing for this movement, the material has nowhere to go. It will warp, bow upward, and eventually tear away from the screws.
To accommodate thermal movement, you must pre-drill every single hole. Every hole drilled through the polycarbonate must be 2mm to 3mm (about 1/8 inch) larger than the shank of the screw. Use a step drill bit to create clean, round holes without catching the internal flutes. This oversized hole acts as a floating mechanism. It allows the panel to slide slightly back and forth beneath the EPDM washer as temperatures fluctuate throughout the day.
Driving the fasteners requires strict torque control. You must define the exact visual cue for correct installation. Drive the screw until the EPDM washer makes full, flat contact with the panel surface. Stop immediately. The washer should look like a flat pancake. It must not compress heavily, deform, or cause the polycarbonate surface to dimple. A dimpled surface indicates over-tightening. Over-tightening restricts thermal movement and creates a physical depression where rainwater will pool and eventually leak through the screw threads.
When seating panels inside H-channels or U-profiles, you must calculate proper edge engagement. We specify a minimum bite depth of 20mm (about 3/4 inch). The panel needs to sit deep enough inside the extrusion so that when it contracts in cold weather, it does not slip out of the track. However, it must not be pushed completely tight against the center web of the profile. It needs a 1/8 inch gap to expand in hot weather. Maintaining this exact tolerance prevents blow-outs during severe negative wind pressure events.
The quality of your roof installation directly dictates the internal microclimate of the structure. When operating a polycarbonate greenhouse for planting sensitive crops, environmental control dictates your yield. Drafts from poorly sealed joints disrupt heating efficiency and waste energy. Water leaks introduce localized high-humidity zones that promote fungal diseases like Botrytis and powdery mildew. A tightly sealed, properly expanding roof ensures predictable temperature and humidity management.
Condensation is inevitable in any heated growing environment. The goal is management, not elimination. The combination of a proper roof pitch, strictly vertical flutes, and breathable bottom vent tape creates a highly efficient passive drainage system. As moisture condenses inside the flutes due to temperature differentials, gravity pulls the droplets down the channels. The breathable tape at the eave allows this water to exit the panel safely. If this system fails due to horizontal flute orientation or incorrect taping, water accumulates. Trapped water leads to massive internal algae growth, which blocks sunlight and causes severe light transmission loss.
Symptom | Root Cause | Corrective Action |
|---|---|---|
Algae growth inside flutes | Missing or blocked bottom vent tape | Remove bottom U-profile, clean flutes with compressed air, apply new breathable tape. |
Popping noises during the day | Screws over-tightened or lack of pre-drilling | Back out screws slightly; ensure holes are 1/8 inch larger than the screw shank. |
Panels slipping out of H-channels | Inadequate edge engagement or excessive rafter spacing | Re-seat panels ensuring 20mm bite depth; add horizontal purlins if spacing exceeds limits. |
Water dripping from screw heads | Deformed EPDM washers or angled screw driving | Replace screws, drive perfectly perpendicular to the panel, stop when washer is flat. |
The apex of the roof is highly vulnerable to weather infiltration. You must detail the installation of the ridge cap carefully. The metal or polycarbonate ridge cap must overlap the top U-profiles of the roof panels by a minimum of 3 inches. Apply a continuous bead of polycarbonate-safe silicone sealant under the ridge cap flanges. This prevents wind-driven rain from blowing up and over the top edges of the panels. Ensure the ridge cap is fastened securely to the underlying structural framing, not just screwed into the plastic panels.
Verify your local wind and snow load building codes to determine the exact rafter and purlin spacing required for your specific panel thickness.
Order aluminum base-and-cap profiles and hex-head screws with EPDM washers to ensure maximum wind uplift resistance.
Set up a dedicated, clean staging table on-site specifically for cutting panels, vacuuming flutes, and applying sealing tapes prior to lifting materials onto the roof.
Calibrate your drills and impact drivers to low-torque settings to prevent over-tightening and dimpling during the final fastening phase.
A: No, you should never overlap multi-wall polycarbonate panels like traditional corrugated roofing. Overlapping prevents proper sealing, restricts thermal expansion, and crushes the internal flutes. Panels must be joined side-by-side using specialized H-channels or aluminum base-and-cap extrusions to ensure a watertight, structurally sound connection.
A: You must pre-drill holes that are 2mm to 3mm (approximately 1/8 inch) larger than the shank of the screw. This oversized hole allows the panel to expand and contract safely with temperature changes without binding against the fastener and cracking.
A: The UV-protected side must always face outward toward the sun. This side is indicated by heavily printed protective film or specific labeling. Installing the panel backward causes the plastic to yellow, become brittle, and degrade rapidly under solar exposure.
A: Use a circular saw with a fine-tooth plastic-cutting blade to make clean cuts. Immediately after cutting, use an air compressor with a narrow nozzle or a strong shop vacuum to blow or suck the plastic swarf out of the open flutes before applying sealing tapes.
A: No. Standard roofing screws lack the proper washers and cause galvanic corrosion when reacting with the frame. You must use hex-head screws equipped with UV-resistant EPDM neoprene washers to seal the oversized holes without crushing the panel.
A: Condensation occurs naturally due to temperature differences between the inside and outside of the greenhouse. To manage it, ensure flutes run vertically and use breathable vent tape on the bottom edge, allowing the moisture to drain out passively.


